How-To Guide: Garden Pallet Sofa


With lockdown well underway I wanted a project and, seeing as I knew we were going to be spending a LOT of time in the garden this summer, a pallet sofa seemed like a great idea. When I started this, I promise there weren’t a gazillion memes about wankers making garden furniture out of pallets. If there had have been it may have made me question the project altogether but now that I have it, I wouldn’t be without it and you know what? I wouldn't spend £600+ on a regular furniture set/garden sofa because honestly…in terms of quality, it’s just not worth it.
I wanted to utilise a small section at the back of our garden that wasn’t really being used for anything. Because our garden is south facing, the fence meant that this corner was always shady. We’d inherited some rose bushes - which weren’t thriving - and the only other things you’d find there was a ton of spiders. I had a vision of pouring concrete and setting up the garden table there, but with lockdown strangling our finances and no construction work going on, I decided that a gorgeous sofa along the back would be perfect.
Please believe me when I tell you - I AM NO DIY WIZARD. I’m not handy in the slightest and my methods aren’t always the prettiest but they do work. The good news is, if you’re as useless as me, this how-to guide will work perfectly. If you’re better than me, your pallet sofa will look even prettier than mine and, while I’m not one to brag, that’ll mean you’ll get a pretty damn amazing piece of furniture…for not much money at all. Here’s how…

BEFORE: This section of the garden had been dead space and only used by spiders.

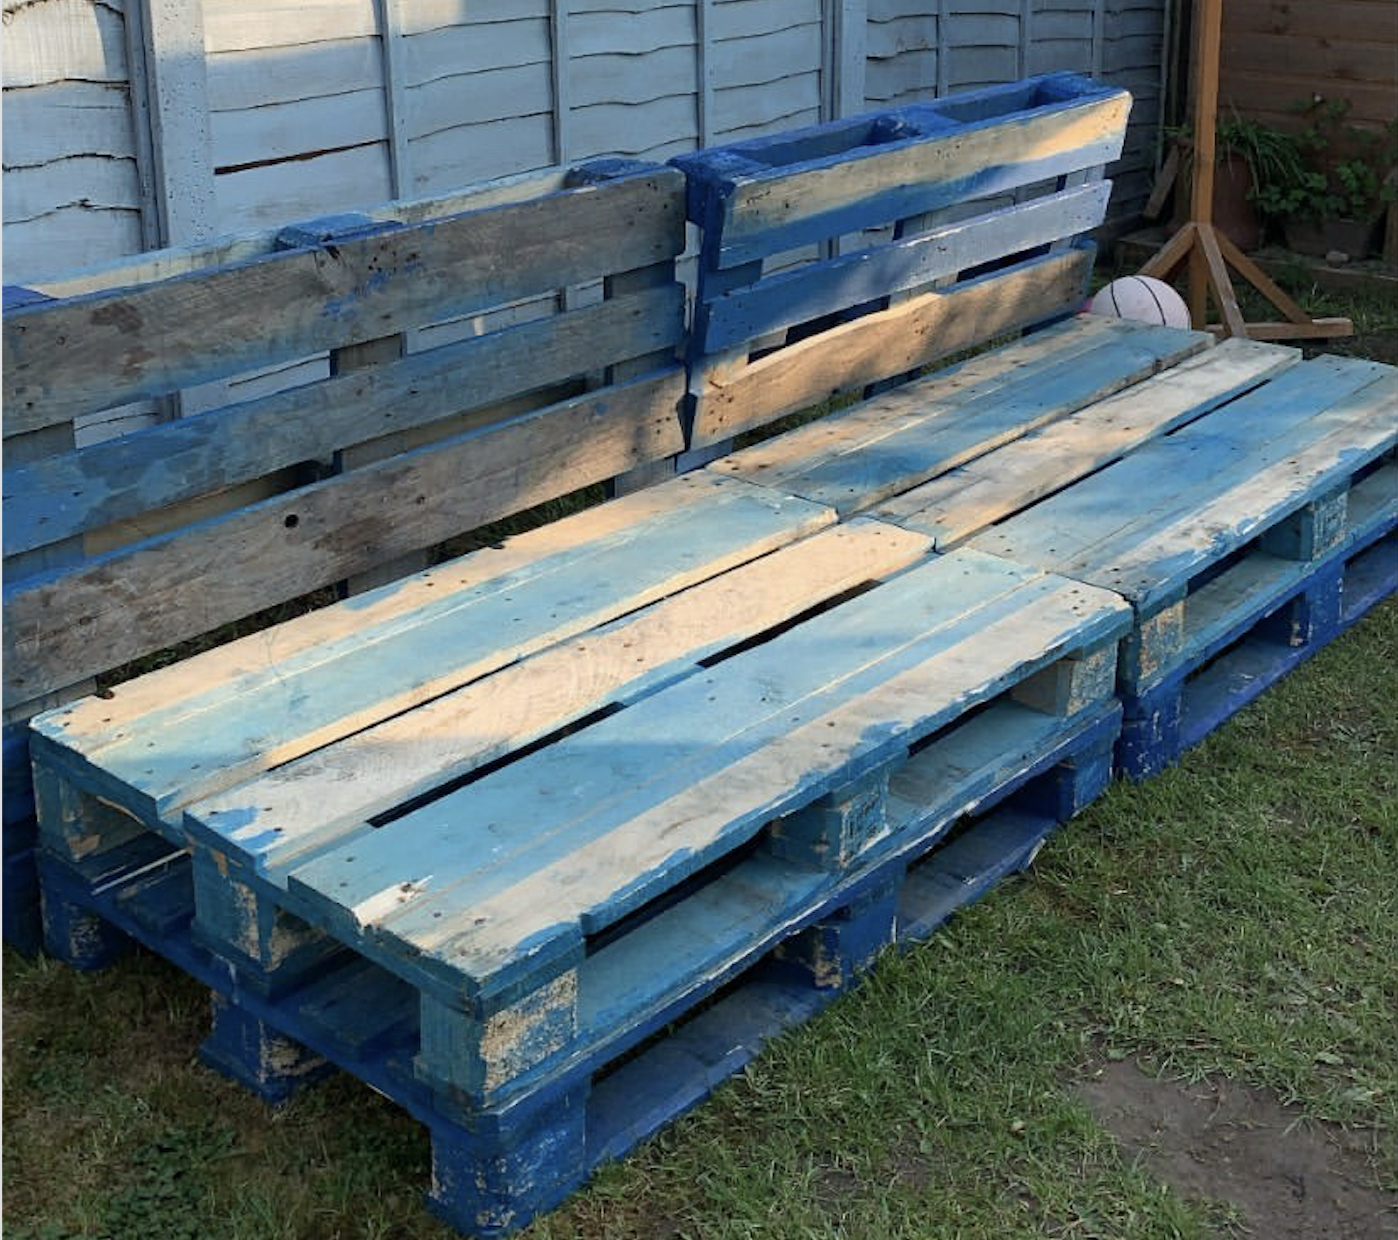
AFTER: A little corner of Ibiza amidst a shitshow of (out of picture) trampolines, blow up sharks and a gazillion flat footballs.
WHAT YOU’LL NEED…


STEP BY STEP GUIDE…

FIND YOUR PALLETS
There are a number of ways to do this. You can, as we did, keep your eyes open for any discarded pallets. Skips and building sites are a great place to start, as well as behind shops and supermarkets. ALWAYS ASK BEFORE YOU TAKE THEM. You need to make sure that a) they aren’t actually owned by a pallet company and b) they haven’t had any nasty chemicals on them. We found six behind a local shop and they were happy for us to take them away. Alternatively, there are tons of places selling pallets - eBay is a great place to start.
For the sofa I made - you’ll need six 1200 x 1000mm pallets (good news…they’re the ones you’re most likely to find).

2. CLEAN AND SAND YOUR PALLETS
Pallets are not intended to be used as furniture (shocker) so the wood can be rough and therefore full of splinters. Clean off any visible muck and dirt using a brush and then, with an electric sander (if you have one…because it’s a billion times easier) and a mask (note I forgot to wear a mask because I’m a dick) sand over the pallets. Make sure to focus on the edges and corners as these are going to be the most likely parts to be in contact with skin but give the whole thing a decent sand. Not only will it reduce the risk of splinters, it’ll also make it easier to paint.
3. SCREW YOUR PALLETS TOGETHER
For each chair you’ll need three pallets. For the seat part, put one pallet on top of the other and screw it together. I did this wherever and however I could. I went heavy on the screws - not pretty but it worked. You can be more aesthetic about it but considering it’s going to be covered in paint and cushions, I didn’t have time for that shit. Once you’ve done that, screw the third pallet to the back of the seat. You’ll have to use the joining plates to do this as the pallets don’t connect at any easy-to-screw points. We decided to keep the two chairs separate in case we wanted to move them or use them in a different configuration.
1. This is how you will screw them together. NOTE: Don’t saw the back pallet and put it ON TOP of the base. It’ll be harder to get it secure but also, pallet cushions are made to be 1000m deep and if you loose 80cm you’ll have to get custom made cushions which are significantly more expensive.

1. I screwed the two base pallets together any which way I could. Wherever you can get good purchase, pop a screw in. You’re going to reinforce them with joining plates later.

2. Use joining plates to screw the back on. You’ll find there aren’t many places to actually screw the back to the base so you’ll have to use joining plates. If you have REALLY long screws and you can get some purchase then do that too, but I just used joining plates to attach the back.

3. I reinforced the connection between the bad pallet and the base by bending a joining plate and screwing them along the back too.
4. PAINT YOUR PALLETS

Wait until your pallets are screwed together before painting, that way you only have to paint what you need to paint and you won’t waste time and paint covering parts that are never going to be seen. I used the Rustoleum Furniture Paint in Powder Blue.
Because of their rough nature, they’re not the most enjoyable things to paint especially the ends which are really rough - no matter how much you sand them. To get a good coverage you have to go quite thick with the paint. I also had to do two coats but because I was outside, they dried really quickly and it wasn’t too much of a ball ache.
5. MOVE THEM INTO PLACE

We placed them directly on to the grass. In an ideal world, I’d rather have them on decking or concrete, but it’s not an ideal world. So, we used gravel to cover the soil bed and make sure the sofa sat flat and even. We had to play around with it a bit but we got there in the end.
6. CUSHIONS

Weatherproof cushions from Armadillo Sun
There are a million places that you can buy pallet cushions from on the internet, but I knew I wanted to make sure we got cushions that were comfortable, stylish and that would last. I wanted them to be weatherproof, but I didn’t want them to look like gym crash mats so I went to Armadillo Sun. I’d worked with the lovely Caroline before so she was kind enough to give me a press discount. Now, these cushions aren’t cheap. They are the only company in the UK to use a fabric from the states that is truly weatherproof meaning, you can leave your cushions out ALL YEAR ROUND. All you have to do, to keep them fresh, is power wash them every spring and they’ll look brand new. While it may seem like a lot of money for cushions remember - the sofas have cost you barely anything at all and, if you were to buy a ready made garden sofa, you’d spend about the same and the cushions would be RUBBISH (plus you’d have to store them somewhere during the 46 weeks of shit weather. I don’t have time or space for that so I invested in decent cushions. Armadillo Sun usually makes outdoor seating - bean bags and modular sofas - but they also accept custom orders. I chose their navy blue fabric and ordered four turquoise based cushions.


If your garden vibe is perfect landscaping and sleek finishes, then this probably isn’t the sofa for you. It’s a bit boho, it’s a bit rustic but it’s perfect for my kind of garden. I’ve got kids and an addiction to red wine so these hard AF Armadillo Sun cushions (yes, they are red wine repellent too) are perfect. The whole sofa is now my little oasis. I have a morning coffee there and an evening glass of wine and because it’s in the shade, it’s a little retreat from the beating sun. I cannot recommend it enough - yes it’s harder than buying them off the internet but its so much cooler and a damn site cheaper.